Submitted
The Whitewater Ski Team families are passionate skiers from the new ripping under-six racers to the super stoked grandparents. The ski community is diverse, but there is one common theme that all skiers seem to love: freedom.
Skiing is freedom, freedom as you explore the mountains, float through the powder, and carve with power and precision.
To carve with full power the hips need to be fully angulated at the end of the turn. This means that the hips need to be fairly level, directly above the balls of the feet and moving in toward the centre of the turn.
The ski turn can be broken into three parts; initiation, loading and release. The forces build through the turn, effectively bending the ski, which temporarily stores energy until the end of the turn where the forces are released. These forces are generated by gravity pulling straight down the hill and when you change direction that energy is converted into centrifugal force. More speed combined with an efficient turn will mean increasing forces and more fun and freedom on the snow.
The forces peak near the end of the turn and allow the skier’s body to be way inside the arc, completely suspended as if weightless. Sound like fun?
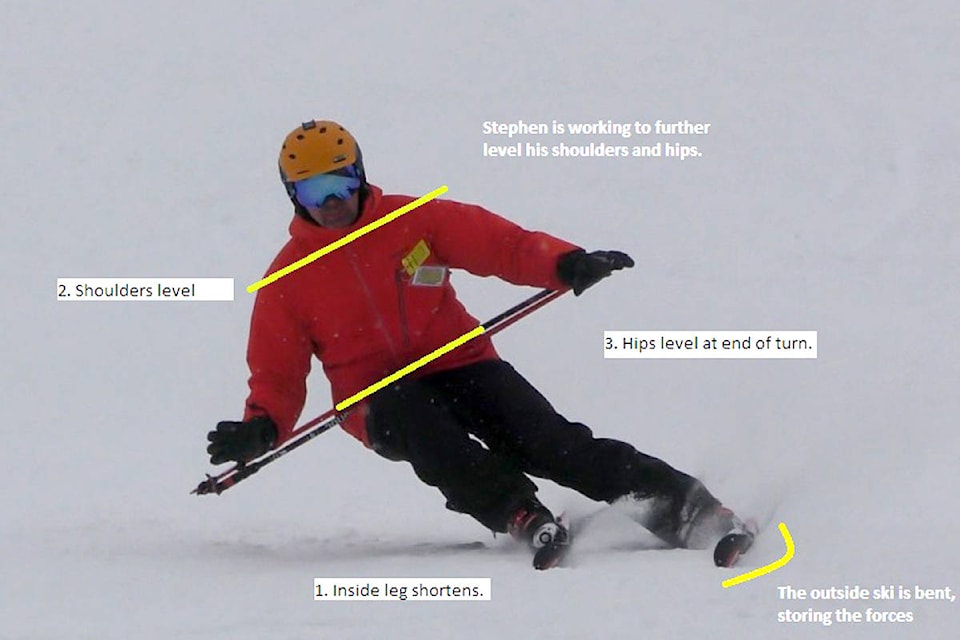
In order to maximize this sensation it is necessary to maintain weight on the outside ski, which can be challenging. In this suspended position it is necessary to shorten the inside leg, level the shoulders, and finally level the hips. These three movements transfer the forces to the outside ski, which will carve efficiently, bend and store the energy, and finally release the energy needed to start the next turn.
The hip leveling drill that I have had the most fun with lately requires you to put your poles around your waist.
To do this you need to stick one pole tip through the other pole’s strap, and repeat with other pole tip so that you are effectively wearing your poles horizontally around your waist. To snug them up you may need to put some twists in your pole straps before sticking the other pole through.
Now, standing with poles snug around your waist, feel where your pelvic bones are and slide the poles just below them. This now creates a line between your hip joints showing how level they are. Keep this drill to the groomed runs and remember to remove the poles in the lift line or you may get some complaints.
Start on an easy groomer keeping your hands ahead of the poles, remembering to shorten the inside leg, level the shoulders, and finally level the hips at the end of the turn. Then go to a steeper groomed run and increase speed and the size of turns making them very round and continue to level the hips. You can also hold onto the pole straps using the poles to assist levelling the hips. When the hips are totally parallel with the slope, all of the weight will be on the outside ski creating great hip angulation, full power in the carve and pure skiing freedom.
Dylan Henderson is the head coach of the Whitewater Ski Team. He is a certified Development Level coach with the Canadian Ski Coaches Federation and a Level 1 ski instructor with the Canadian Ski Instructors Association. Henderson was also named 2017’s top ski coach by B.C. Alpine.